


At the start of the year, like many book lovers, I made an ambitious list of books to read. Fast forward to the second half of the year, and let’s just say that list hasn’t gotten any shorter!
If you’re anything like me, your reading corner might be more of a book avalanche waiting to happen. Or maybe you are looking to pick up reading and make the most out of the rest of the year. Either way, I have the perfect DIY project to get us back on track and make our reading spaces a bit more organised and charming: a DIY Mini Bookshelf.
Imagine having a cute, little bookshelf on your desk, keeping your current reads within arm’s reach. No more leaving that book you swore you’d finish last month hidden away or out of reach. This project is not just practical but also a great way to add a personal touch to your space. Plus, it’s a fantastic way to reignite that excitement for reading.
So, let’s get our creative juices flowing and start building. It’s an easy project that even the most dedicated bookworm can tackle without breaking a sweat. Whether you already have a pile of books begging for a home or you’re just looking to kickstart your reading habit, this DIY mini bookshelf is perfect for you.
PROJECT - DIY Mini Bookshelf
Materials 2 pieces of 15cm x 15cm wood
2 pieces of 10cm x 30cm wood
Tools and accessories
Ruler
Drill driver
Countersink bit
Philips bit
Sander
Screws
Personal Protective Equipment (PPE)
Mask
Goggles
1. Start by getting our materials ready. You’ll need four pieces of wood: two measuring 15cm x 15cm, and two measuring 10cm x 30cm. Adjust the measurements if you prefer a bigger shelf.
 Start by getting our materials ready. You’ll need four pieces of wood: two measuring 15cm x 15cm, and two measuring 10cm x 30cm. Adjust the measurements if you prefer a bigger shelf.
2. Time to mark your measurements! On one of the 10cm x 30cm pieces, draw an 8mm line along the long side. Mark four points for drilling holes at 1.5cm, 10cm, 20cm and 28.5cm intervals.
 Time to mark your measurements! On one of the 10cm x 30cm pieces, draw an 8mm line along the long side. Mark four points for drilling holes at 1.5cm, 10cm, 20cm and 28.5cm intervals.
3. Next, align the two longer pieces to form a ‘V’ shape and trace this outline onto both 15cm x 15cm pieces.
 Next, align the two longer pieces to form a ‘V’ shape and trace this outline onto both 15cm x 15cm pieces.
4. Once you have the ‘V’ shape traced, make four marks along the centreline at 3cm and 8cm intervals.
 Once you have the ‘V’ shape traced, make four marks along the centreline at 3cm and 8cm intervals.
5. Using a drill driver fitted with a countersink drill bit, drill holes at the marked points on all three pieces.
 Using a drill driver fitted with a countersink drill bit, drill holes at the marked points on all three pieces.
6. Smooth it out! Grab some 320-grit sandpaper and carefully sand all edges and surfaces. This step ensures there are no rough spots, giving your mini bookshelf a smooth finish.
 Smooth it out! Grab some 320-grit sandpaper and carefully sand all edges and surfaces. This step ensures there are no rough spots, giving your mini bookshelf a smooth finish.
7. Switch to a Philips bit and secure the two longer pieces together using 1in (2.5cm) screws.
 Switch to a Philips bit and secure the two longer pieces together using 1in (2.5cm) screws.
8. Place it on its side to attach one of the side pieces, aligning it with the marked points. Flip it over and attach the other side piece to finish it off.
 Place it on its side to attach one of the side pieces, aligning it with the marked points. Flip it over and attach the other side piece to finish it off.
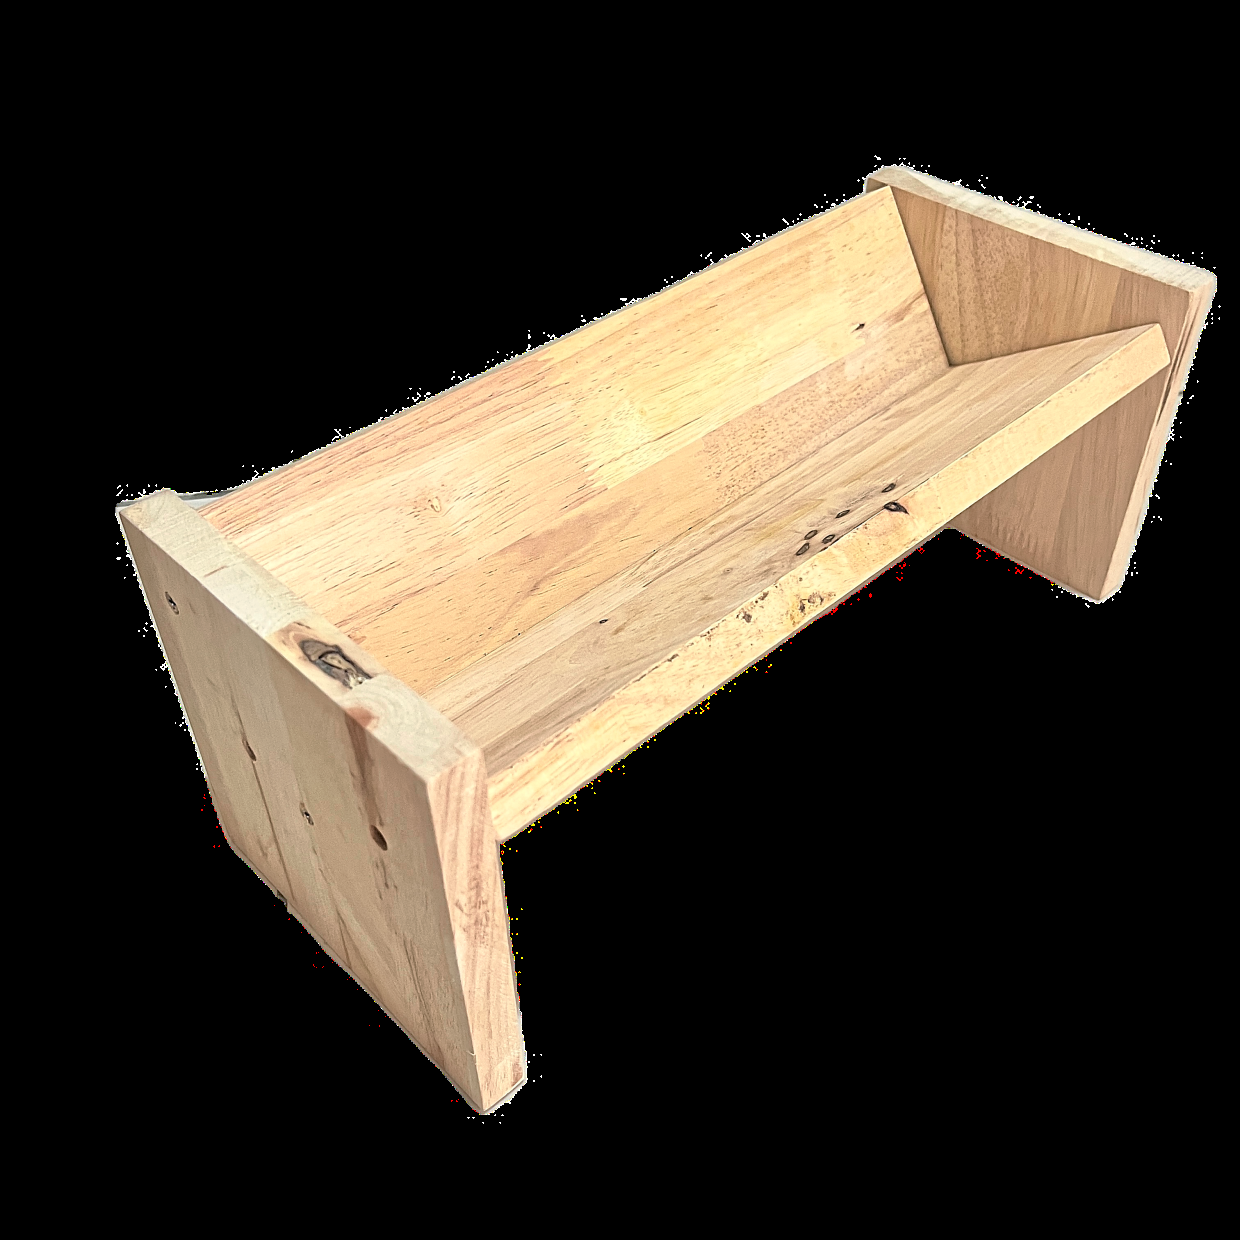
Ta-Da!

Aida Ihsani is a self-taught DIYer and woodworker with over eight years of experience. Through her women’s woodworking workshops, she has empowered over 1,000 women from all walks of life to be confident in using power tools and start their DIY journey. For more on Aida’s workshop, visit www.aidaihsani.com or @iamaidaihsani on Instagram.
Next, align the two longer pieces to form a ‘V’ shape and trace this outline onto both 15cm x 15cm pieces.
Switch to a Philips bit and secure the two longer pieces together using 1in (2.5cm) screws.
Time to mark your measurements! On one of the 10cm x 30cm pieces, draw an 8mm line along the long side. Mark four points for drilling holes at 1.5cm, 10cm, 20cm and 28.5cm intervals.
Once you have the ‘V’ shape traced, make four marks along the centreline at 3cm and 8cm intervals.
Start by getting our materials ready. You’ll need four pieces of wood: two measuring 15cm x 15cm, and two measuring 10cm x 30cm. Adjust the measurements if you prefer a bigger shelf.
Using a drill driver fitted with a countersink drill bit, drill holes at the marked points on all three pieces.
Smooth it out! Grab some 320-grit sandpaper and carefully sand all edges and surfaces. This step ensures there are no rough spots, giving your mini bookshelf a smooth finish.
Place it on its side to attach one of the side pieces, aligning it with the marked points. Flip it over and attach the other side piece to finish it off.


